
Table of Contents
- Why Leather Holster Printing Happens (And What You Can Actually Fix)
- Step 1: Choose the Best Gun Belt for Concealed Carry
- Step 2: Dial In Your Concealed Carry Holster Positioning
- Step 3: Use Concealment Claws, Wings, and Holster Wedges
- Step 4: How to Dress for Concealed Carry Without Looking Tactical
- Step 5: Break In and Maintain Your Leather Holster the Right Way
- Step 6: Practice Your Draw Stroke to Stay Concealed Under Pressure
- Conclusion
Last Updated: August 26, 2026
Why Leather Holster Printing Happens (And What You Can Actually Fix)
Leather holster printing occurs when your firearm's outline becomes visible through clothing, compromising concealment. Most printing problems stem from fixable causes: the wrong belt, wrong holster position, or wrong clothes, not from leather holsters being inherently flawed. Full-grain leather requires a break-in period before conforming tightly to your firearm, which is why properly broken-in leather holsters often conceal better than synthetic options over time.

Before swapping your holster, address the actual causes. The fix is usually cheaper and simpler than you think.
Printing vs. Shadowing: Knowing the Difference
Printing is when the distinct shape of your firearm pushes visibly against your cover garment. Shadowing is a softer, less defined darkening in the fabric that hints at something underneath without revealing a clear firearm profile.
Shadowing is largely unavoidable with any carry setup. Printing, a clearly outlined pistol grip through a tight shirt, is what this guide addresses.
Step 1: Choose the Best Gun Belt for Concealed Carry
A weak belt is the single biggest source of printing. Standard dress belts flex under holster and firearm weight, causing the holster to sag outward and tip the grip away from your body. A dedicated gun belt with a stiff inner core holds the holster flat against your waistline and distributes weight evenly.
A proper carry belt should be thick enough to fill your holster's belt loops completely. A loose fit lets the holster wobble and rotate, creating inconsistent concealment and a poor draw stroke.
According to the National Shooting Sports Foundation's concealed carry resource guide, the belt is the foundation of any effective carry system, and most printing problems trace back to inadequate belt support rather than the holster itself.
Key qualities to look for:
- Rigid construction that doesn't flex or fold under load
- Correct width to match your holster's belt loops
- Full-grain leather or reinforced nylon core for lasting shape retention
- Minimal stretch over time
If your belt collapses when folded in half, it's not doing its job. Upgrade the belt before you blame the holster.
Step 2: Dial In Your Concealed Carry Holster Positioning
Holster positioning affects printing more than almost any other variable. The two main adjustments are ride height and cant.
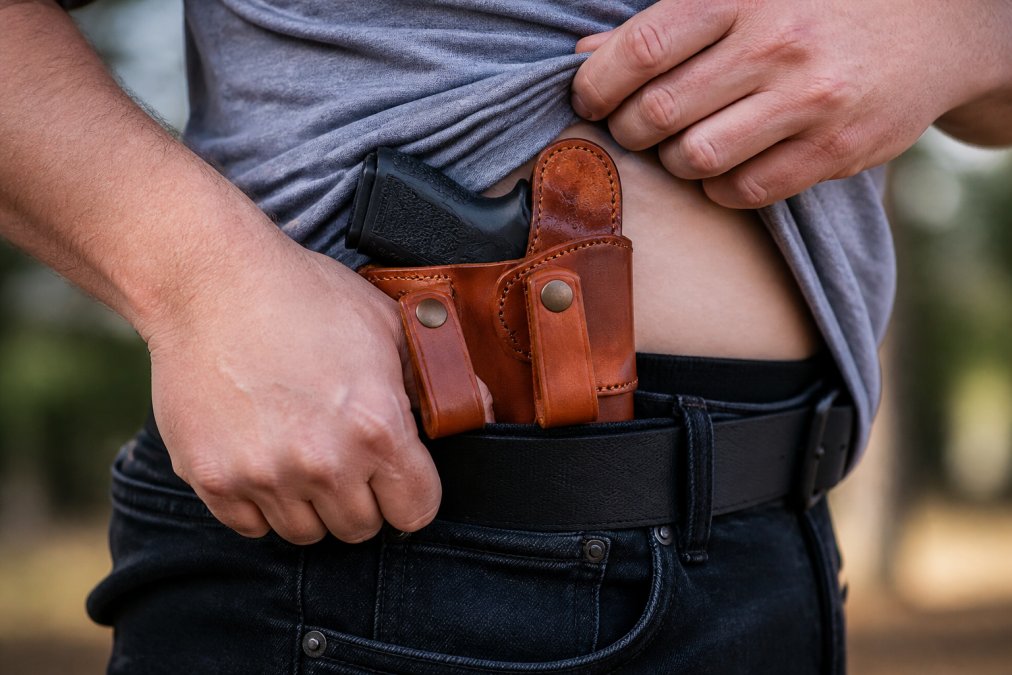
Ride height controls how high or low the firearm sits relative to your waistband. A lower ride height tucks the grip deeper into the waistband, reducing the holster footprint above the belt line. For most IWB setups, a ride height that keeps the top of the grip just at or slightly below the belt line minimizes printing while keeping the draw accessible.
Cant controls the angle the firearm tilts. A forward cant (FBI cant) works well at strong-side hip positions. For appendix carry, a slight forward cant or neutral cant usually works best. Experiment in 5-degree increments and check your profile in a mirror from multiple angles.
How Body Geometry Changes Where You Should Carry
Your build directly determines which positions work and which create unavoidable printing. Carriers with a straighter torso tend to do well with strong-side hip carry at the 3-4 o'clock position. Carriers with more midsection curvature often find appendix or kidney carry reduces printing because the holster sits in a natural contour. Taller carriers have more waistband real estate; shorter carriers often benefit from a higher ride height to keep the grip accessible without printing below the belt line.
Test different positions with a mirror and an honest eye.
Step 3: Use Concealment Claws, Wings, and Holster Wedges
A concealment claw is an attachment that hooks onto your belt and uses belt tension to rotate the grip inward toward your body, dramatically reducing the holster footprint visible through clothing. A holster wedge is a foam or rubber wedge attached to the back of the holster that pushes the muzzle end outward, rotating the grip inward against your body.
Used together, a claw and wedge address grip-printing from two angles simultaneously, flattening the firearm profile against your torso.
| Accessory | How It Works | Best For |
|---|---|---|
| Concealment claw | Uses belt tension to rotate grip inward | Appendix and strong-side IWB carry |
| Holster wedge | Pushes muzzle end out, tilts grip in | Appendix carry, reducing muzzle printing |
| Soft loops | Increases belt contact, reduces holster tilt | Any IWB position with sagging issues |
These additions cost very little and solve problems a new holster won't fix on its own.
Step 4: How to Dress for Concealed Carry Without Looking Tactical
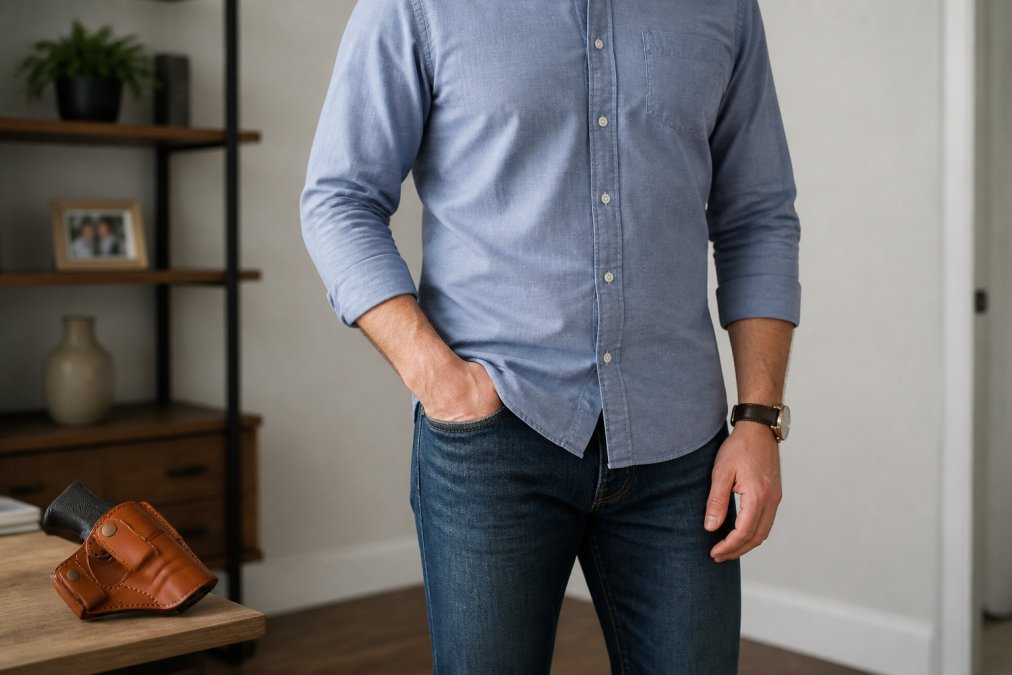
The most common mistake is wearing clothes that are too tight. A shirt that drapes against your body will print regardless of holster positioning. You need one size up from your normal fit, which creates enough fabric drape to break up the firearm profile without looking deliberately oversized.
Structured fabrics conceal better than thin, clingy ones. Denim, canvas, and heavier cotton blends don't drape tightly against a holster the way thin polyester does. Patterns break up shadowing better than solid colors, particularly solid light colors which show every contour.
Avoid thin, stretchy fabrics, solid light-colored shirts at the hip, tucked-in shirts without a tuckable holster, and shirts that end exactly at your waistline.
Fabric Selection and Layering Strategies by Climate
Warm weather: An open structured overshirt (chambray, light flannel, or heavier linen blend) over a base layer works well. The open front creates a visual break that eliminates the silhouette problem at the hip.
Cold weather: A fleece, light jacket, or untucked flannel adds substantial concealment without tactical appearance.
Hot, humid climates: Look for looser-weave cotton or moisture-wicking blends with enough body weight to drape rather than cling. A loose-fit athletic polo in heavier fabric can work surprisingly well.
According to the Concealed Carry Magazine resource center, clothing selection accounts for a significant portion of real-world concealment success, particularly in warm-weather carry scenarios.
Step 5: Break In and Maintain Your Leather Holster the Right Way
A new leather holster is stiffer and slightly bulkier than it will be after proper break-in. The leather hasn't yet conformed to your firearm's geometry, and the holster body sits farther from your torso than it will once the leather relaxes and molds.
The right break-in process:
- Insert your unloaded firearm and work it in and out 50-100 times over the first few days
- Wear the holster for short periods around the house before all-day carry
- Apply a light coat of leather conditioner after the first week
- Avoid soaking leather holsters, which weakens stitching and causes loss of molded shape
Condition your holster every few months using a quality leather conditioner applied sparingly.
The AnchorsAweighLeather HOSS IWB Leather Holster and the Texas Rebel IWB Conceal Carry Holster are handcrafted from premium full-grain leather and will reach their best concealment profile after proper break-in.

Step 6: Practice Your Draw Stroke to Stay Concealed Under Pressure
Most carriers practice the draw but not what happens to their cover garment during it. A rushed draw that sweeps your cover garment up too high can expose your holster to everyone nearby, even when static concealment is perfect.
The standard IWB draw stroke for a cover garment:
- Use your non-dominant hand to sweep or pinch the cover garment clear of the grip
- Establish a full firing grip before the firearm clears the holster
- Drive the firearm straight up and out, clearing the holster cleanly
- Bring the firearm to the target while the cover garment falls back into place
Practice re-holstering slowly and deliberately. Rushing the re-holster is where negligent discharges happen and where cover garments get caught in the trigger guard.
As noted in USCCA's concealed carry training resources, dry-fire practice with your actual carry setup is one of the highest-value training habits a concealed carrier can build.
Regular practice also reveals printing problems you won't notice standing still. Movement, bending, and reaching all shift your holster position and change your concealment profile.
A draw stroke checklist:
- Cover garment clears the grip cleanly without excessive lifting
- Firing grip is established before the firearm moves
- Draw is smooth and consistent across 20+ repetitions
- Re-holster is slow, deliberate, and visually confirmed
- Concealment profile checked during movement, not just standing still
Preventing leather holster printing takes a system-level approach. The combination of a rigid gun belt, dialed-in holster positioning, concealment accessories, and the right cover garment eliminates printing for the vast majority of setups. If you're starting with a quality handcrafted leather holster, the AnchorsAweighLeather lineup gives you the right foundation: the Custom Leather IWB Holster starts at $43, the Texas Rebel IWB is $50, and the HOSS IWB is $60.50, all handcrafted from premium full-grain leather in the USA with free shipping on orders over $100. Get the right holster, build the right system around it, and printing becomes a solved problem.

=== FAQ ANSWERS (audit these too, same rules) ===
[1] Q: How do I stop my leather holster from printing through my shirt? A: The most effective fixes are a rigid gun belt that prevents sagging, adjusting your holster's ride height so the grip sits below your waistband, and adding a concealment claw or wing that presses the grip inward toward your body. Cover garments with structured fabric and a slight texture also break up the firearm's silhouette. For leather holsters specifically, a proper break-in period matters, a fully molded holster sits flatter and reduces overall holster bulk compared to a stiff, new one.
[2] Q: Does holster position affect how much a leather holster prints? A: Yes, significantly. Appendix carry (AIWB) typically prints less for slimmer firearms because the holster sits over the front of the hip where the body curves inward. Strong-side hip carry at the 3-4 o'clock position can cause more printing if the grip tilts outward. Adjusting holster cant to a forward angle pulls the grip closer to the body. Experimenting with ride height and carry angle for your specific body geometry is the fastest way to reduce your visible profile.
[3] Q: Should you oil a leather holster, and does it help with bulk? A: Light conditioning keeps leather supple and extends its life, but over-oiling causes the leather to soften too much, which can increase holster bulk and reduce retention. Use a quality leather conditioner sparingly, once every few months is enough for most carry holsters. A properly conditioned leather holster holds its molded shape better, which means the firearm profile stays tight and predictable rather than shifting around under your cover garment.
[4] Q: What clothing choices help reduce holster printing? A: Structured fabrics like denim, canvas, and heavier cotton weaves conceal better than thin knits or fitted athletic wear. Untucked shirts, flannels, and light jackets add a layer that breaks up the holster's outline. Avoid tight-fitting shirts that stretch across the waistband. For warmer climates, a loose linen or chambray shirt worn open over a solid undershirt works well. The goal is fabric with enough body to drape naturally without clinging to the holster footprint.
Frequently Asked Questions
How do I stop my leather holster from printing through my shirt?
The most effective fixes are a rigid gun belt that prevents sagging, adjusting your holster's ride height so the grip sits below your waistband, and adding a concealment claw or wing that presses the grip inward toward your body. Cover garments with structured fabric and a slight texture also break up the firearm's silhouette. For leather holsters specifically, a proper break-in period matters, a fully molded holster sits flatter and reduces overall holster bulk compared to a stiff, new one.
Does holster position affect how much a leather holster prints?
Yes, significantly. Appendix carry (AIWB) typically prints less for slimmer firearms because the holster sits over the front of the hip where the body curves inward. Strong-side hip carry at the 3-4 o'clock position can cause more printing if the grip tilts outward. Adjusting holster cant to a forward angle pulls the grip closer to the body. Experimenting with ride height and carry angle for your specific body geometry is the fastest way to reduce your visible profile.
Should you oil a leather holster, and does it help with bulk?
Light conditioning keeps leather supple and extends its life, but over-oiling causes the leather to soften too much, which can increase holster bulk and reduce retention. Use a quality leather conditioner sparingly, once every few months is enough for most carry holsters. A properly conditioned leather holster holds its molded shape better, which means the firearm profile stays tight and predictable rather than shifting around under your cover garment.
What clothing choices help reduce holster printing?
Structured fabrics like denim, canvas, and heavier cotton weaves conceal better than thin knits or fitted athletic wear. Untucked shirts, flannels, and light jackets add a layer that breaks up the holster's outline. Avoid tight-fitting shirts that stretch across the waistband. For warmer climates, a loose linen or chambray shirt worn open over a solid undershirt works well. The goal is fabric with enough body to drape naturally without clinging to the holster footprint.
This article was written using GrandRanker
0 comments