
Last Updated: October 29, 2026
Quick Summary
To attach a knife sheath to a tactical belt, first measure the belt width and confirm the sheath has an attachment point, then add a belt loop, clip, or MOLLE straps. Check that it stays put by pulling, shaking, bending and drawing the knife before you wear it. This explains how to attach a knife sheath to a tactical belt.
- Most tactical belts are 1.5 inches wide, so measure at the spot where the sheath will sit.
- For a 1.5-inch belt, a sewn loop should have an interior opening of roughly 1 3/4 inches.
- Add about 1/4 inch of clearance so the loop slides on without binding but does not flop.
- Use at least two rows of stitches on a belt loop so the load spreads across the leather.
- Run four checks before wearing it: pull, retention, movement and draw tests.
Table of Contents
- Before You Start: Check Your Belt and Sheath
- Option 1: Attach a Knife Sheath Belt Loop
- Option 2: Use a Knife Sheath Belt Clip
- Option 3: Attach a Knife Sheath to MOLLE Belt Webbing
- Step-by-Step Checks to Secure a Knife Sheath
- Carry Position, Ride Height, and Draw Access
- Booking a Sheath That Fits Your Belt and Knife
- Frequently Asked Questions
Before You Start: Check Your Belt and Sheath
Getting a knife sheath to stay put on a tactical belt comes down to two things: the belt's width and the sheath's attachment point. Knowing how to attach a knife sheath to a tactical belt starts with checking both before you buy or mount anything. A common mistake is buying a sheath, strapping it on, and finding it sagging or rotating within an hour.
Start by measuring your belt. Most tactical belts are 1.5 inches wide, but some run wider or narrower.
Next, look at your sheath. Pancake sheaths lie flat against the body and usually need a belt loop, clip, or other attachment point added.
- Belt width: Measure it at the spot where the sheath will sit.
- Belt material: Thick nylon webbing grips differently than leather.
- Sheath attachment points: Look for existing holes, loops, or mounting slots.
- Knife fit: A snug knife stays put. A loose one shifts and falls out.
Watch out: Don't force a sheath onto a belt that's too narrow or too wide. A loose fit can let the knife slip free when you bend or move.
Option 1: Attach a Knife Sheath Belt Loop
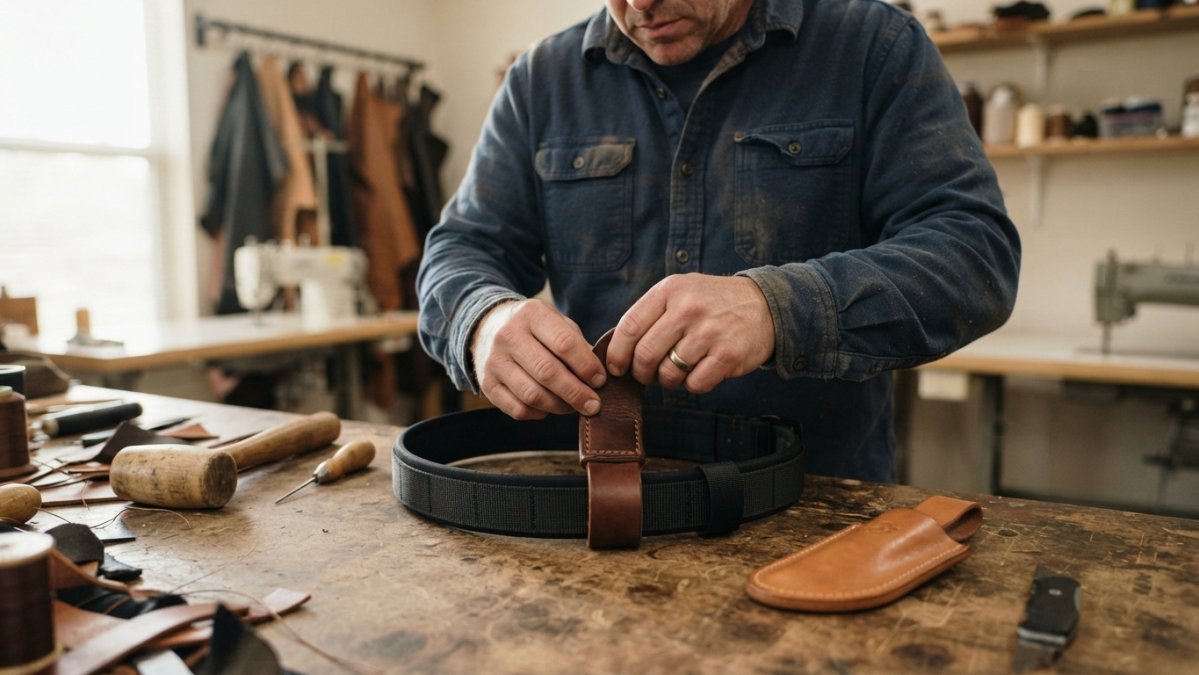
A belt loop is the simplest way to learn how to attach a knife sheath to a tactical belt, since it hangs a pancake sheath from the belt with almost no setup. The loop slides over the belt, and the sheath hangs from it. A ready-made pancake sheath with a belt loop is available if you'd rather skip sewing your own. It works well for everyday carry because it adds very little bulk.
Sizing the Loop to Your Belt
Measure your belt at the exact spot the sheath will ride, not at the buckle. Most tactical belts run 1.5 inches wide, but padded belts and duty belts can run 1.75 to 2 inches, and some rigger belts are 1.75 inches.
Belt thickness matters as much as width. A single layer of 8-10 oz leather plus a stiffened backing can push total thickness past 1/4 inch.
Sewing a Belt Loop onto a Pancake Sheath
- A strip of 8-10 oz veg-tan leather, about 2 inches long and 1 1/2 inches wide
- Heavy waxed nylon or polyester thread (size 277 or equivalent)
- A stitching awl or a diamond chisel
- Two leather needles
- A utility knife and a stitching groover
Cut the strip, skive the ends thin so they lie flat against the sheath back, and mark a stitch line about 1/8 inch in from each edge. Punch holes at 3/16 to 1/4 inch spacing. Stitch the loop to the sheath back with a saddle stitch, running at least two rows of stitches across the full width of the loop so the load is spread over leather, not concentrated on one line of holes. Backstitch two holes at each end to lock the thread.
A common mistake is using thread that's too thin, which can snap under the weight of a knife. Choose a heavy waxed thread and match the hole size to it so the stitch fills the hole. If your existing leather sheath has cracked near the loop or stitching, repair it before re-sewing. Learn how to repair cracked leather knife sheaths step-by-step before you re-sew.
Hardware Alternative: Chicago Screws and Rivets
If you do not want to sew, you can bolt a loop on with Chicago screws (also called binding posts) or set copper rivets. Chicago screws are reversible: you can remove them with a screwdriver and reposition the loop later. Use washers under rivet heads on the inside of the sheath so the head does not pull through soft leather.
Fit Test Before You Wear It
Slide the loop onto the belt and hang the sheath. The sheath should sit flat against the hip with the handle where your hand falls.
Many people want a ready-made option. The Rancher Pancake Leather Knife Sheath is available from our catalog at $42.00. The Texas Lineman pancake leather knife sheath is available at $43.00.


The sizing and sewing details above can be summarised as a quick reference for the belt loop method.
| Item | Value | Note |
|---|---|---|
| Standard belt width | 1.5 inches | Most tactical belts |
| Wider belt widths | 1.75 to 2 inches | Padded and duty belts |
| Clearance to add | About 1/4 inch | So the loop slides on without binding |
| Interior loop opening (1.5-inch belt) | Roughly 1 3/4 inches | Starting size for the loop |
| Leather weight | 8-10 oz veg-tan | Strip for the loop |
| Stitch row count | At least two rows | Spreads load across the loop |
| Fastener spacing | At least 1/2 inch apart | Rivets or Chicago screws |
| Fastener distance from edge | At least 3/8 inch | Avoids tear-out |
Option 2: Use a Knife Sheath Belt Clip
A belt clip hooks over the belt and holds the sheath in place. Clips are useful when you want to move the knife quickly between belts, since you can unclip the whole sheath in seconds.
Clips work best on belts that aren't too thick. Check that the clip grips firmly without pinching the sheath. A loose clip lets the sheath tilt or swing, which makes the knife harder to draw.
Option 3: Attach a Knife Sheath to MOLLE Belt Webbing
MOLLE webbing has evenly spaced loops, which give you plenty of places to attach a sheath. On most tactical belts, the PALS rows are 1 inch apart vertically and the webbing channels are about 1 inch wide, so a sheath back with two or more horizontal straps can be woven through in several positions.
Check Compatibility Before You Weave
Not every sheath is MOLLE-ready. Before installing, confirm:
- Strap count: A sheath back with at least two horizontal straps (or two vertical straps that cross two PALS rows) will resist rocking. A single strap lets the sheath pivot.
- Strap width: Straps should be about 1 inch wide to fit standard PALS channels. Narrower straps can slide; wider straps will not thread.
- Snap or hook-and-loop closure: Straps with snaps are faster to install and remove; hook-and-loop is quieter and more adjustable but can loosen with grit.
- Belt thickness: A padded MOLLE belt with thick webbing may not accept a sheath back that has a stiffener. Test-fit with the belt off before you commit.
Step-by-Step: Weaving a MOLLE Back
- Lay the sheath back against the belt and align its top strap with a PALS row.
- Thread the top strap down through one channel and up through the next, alternating over and under the webbing.
- Repeat with the bottom strap on a row at least 1 inch below the first so the two straps do not share a row.
- Cinch both straps snug, then press the snaps or hook-and-loop closed.
- Check that the sheath sits flat and does not lift away from the belt when you pull the handle.
For a secure setup, thread the strap through at least two loops and cinch it snug. If you are using paracord instead of straps, run two separate loops rather than one long lacing so a single cut does not release the whole sheath. Melt the cord ends to prevent fraying.
Cord and Zip-Tie Alternatives
Paracord and heavy zip ties are common field fixes. Zip ties are fast and secure but are single-use and can abrade webbing over time; inspect them after rough use and replace any that show nicks. Neither cord nor zip ties should be your permanent solution if the sheath sees daily draw-and-reholster use, straps with snaps hold tension better over time.
Retention and Troubleshooting
Test the fit by bending, squatting, and reaching before you trust it with a blade. Then check these common failure points:
- Sheath rocks side to side: The straps are sharing a row or are too loose. Move one strap down a row and re-cinch.
- Sheath lifts off the belt on draw: The top strap is too loose or the sheath back is too short for the belt height. Add a third strap or switch to a drop-loop adapter.
- Webbing frays at the channel: A sharp sheath edge or a metal clip is rubbing. Smooth the edge or add a backing plate.
- Snaps pop under load: The strap is too short for the belt thickness. Use a longer strap or switch to hook-and-loop.
Step-by-Step Checks to Secure a Knife Sheath
Once the sheath is attached, run through these checks before you wear it:
- Pull test: Tug the sheath downward and sideways. It should not move.
- Retention test: Shake the sheath gently. The knife should stay seated.
- Movement test: Sit, bend, and crouch. The sheath should stay in place.
- Draw test: Reach down and draw the knife slowly. The path should be clear.
Repeat these checks after the first few days of wear, since leather softens and stretches a bit as it breaks in.
Carry Position, Ride Height, and Draw Access
Carry position affects how easy the knife is to reach. Most people carry on the strong-side hip, but some prefer the front or the small of the back. Adjust the sheath so the handle sits where your hand naturally falls.
Ride height matters too. A higher ride sits closer to the waist and conceals better. For guidance on picking the right height for concealment and draw access, see our holster ride height guide.
Booking a Sheath That Fits Your Belt and Knife
Before you buy, confirm three things: your belt width, your knife's exact size, and whether the sheath already has an attachment point. A sheath that fits your knife but not your belt will never sit right.
Getting the fit right the first time keeps your knife secure and your carry comfortable for years.
Frequently Asked Questions
How do you attach a knife sheath to a tactical belt?
Most sheaths attach in one of three ways: a sewn belt loop, a clip, or a MOLLE-compatible back. Start by confirming the sheath's belt width, since the Rancher Pancake Leather Knife Sheath at $42.00 accommodates up to a 1 1/2 in belt. Choose the method that matches your belt's webbing and hardware, then test the fit by drawing the knife several times before you carry it.
Will a standard knife sheath fit a tactical belt?
It depends on the belt width and the sheath's attachment design. Many tactical belts are wider than traditional leather belts, so check the sheath's stated belt capacity before buying. The Texas Lineman pancake sheath at $43.00 is sized for a 1 1/2 in belt. If your tactical belt is wider, a belt loop or MOLLE attachment usually works better than a fixed slot.
How do you stop a knife sheath from moving on your belt?
Tighten the attachment point so the sheath sits flat against your body. A sheath that rotates usually has a loose belt loop, a clip that isn't fully closed, or an attachment point set too far from the belt's center. Check the fit after a few hours of wear, since leather can settle slightly. Adjust the ride height so the sheath stays stable when you sit, bend, or walk.
How do you check that a knife is secure in its sheath?
Hold the sheath and shake it gently, then turn your body and bend forward. The knife should stay in place without rattling or sliding out. Draw the knife slowly to confirm the retention is firm but not so tight that it scrapes the blade. Repeat these checks each time you attach the sheath to a new belt or after you adjust the mount.

0 comments