
Table of Contents
- Why Cleaning Your Leather Knife Sheath Matters
- What You'll Need to Clean Leather Knife Sheaths
- Step 1: Remove Surface Debris and Dust
- Step 2: Initial Surface Cleaning with Mild Soap
- Step 3: Disinfect and Remove Odors
- Step 4: Best Leather Conditioner for Knife Sheaths
- How to Soften Stiff Leather Sheath and Prevent Brittleness
- Hardware Maintenance and Storage Best Practices
Last Updated: August 28, 2026
Why Cleaning Your Leather Knife Sheath Matters
A leather knife sheath isn't just a carrying case, it's part of your everyday carry system. When you invest in a quality blade, you're protecting your investment when you clean and maintain the sheath that holds it. Neglecting your leather knife sheath leads to accelerated wear, cracking, mold growth, and potential damage to the blade itself.

The real issue most people miss is that leather is porous. It absorbs moisture, dust, oils, and bacteria. Over time, these accumulate and break down the leather's structural integrity. A sheath that looked pristine six months ago can develop brittleness, discoloration, and odor if you skip regular maintenance.
At AnchorsAweighLeather, we craft knife sheaths from vegetable tanned leather designed to develop character over time. But that patina only looks good if you're maintaining the leather properly. The difference between a sheath that lasts decades and one that falls apart in a few years comes down to one thing: consistent, proper cleaning.
This guide walks you through exactly how to clean leather knife sheaths, from removing surface debris to conditioning and storage. You'll learn the specific techniques that prevent brittleness, eliminate odors, and keep your sheath looking sharp for years of hard use.
What You'll Need to Clean Leather Knife Sheaths
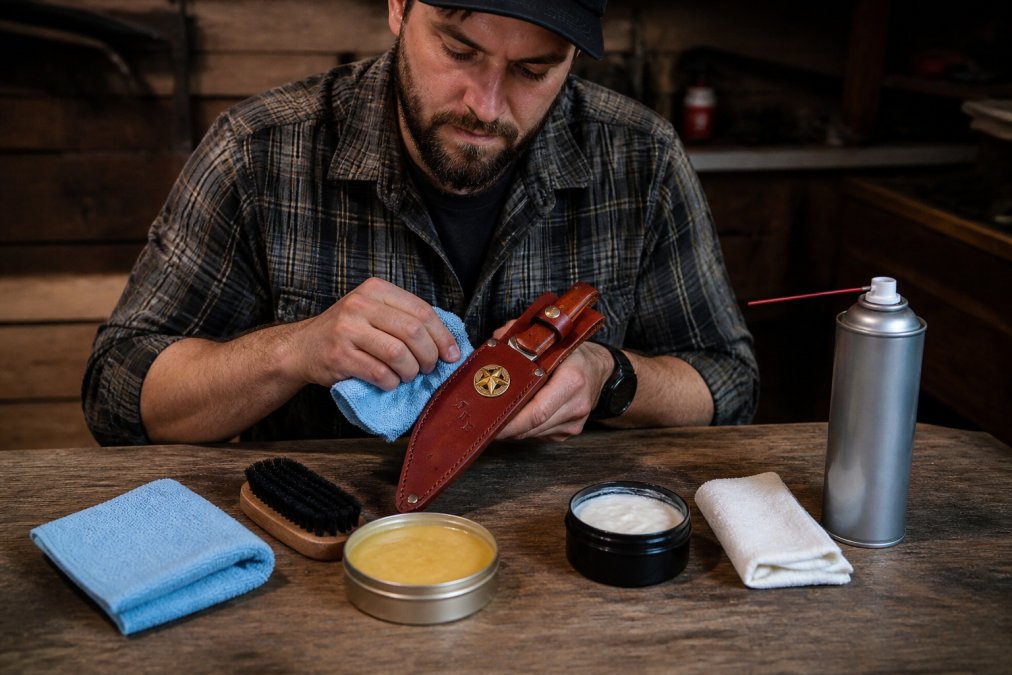
Before you start, gather the right tools. Using the wrong materials can damage leather faster than neglect ever would.
Here's what works:
Cleaning essentials:
- Soft-bristled brush (horsehair or natural bristles, never synthetic)
- Microfiber cloth (lint-free is critical)
- Damp cloth (distilled water only, not tap water)
- Mild soap (unscented dish soap works, or saddle soap formulated for leather)
- Compressed air canister (for debris in tight spaces)
Conditioning and protection:
- Leather conditioner formulated for knife sheaths (not furniture polish or car wax)
- Natural oils work in a pinch, but dedicated leather conditioner is worth the investment
Optional but useful:
- Denatured alcohol (for disinfecting, but test first)
- Soft cloth for buffing and polishing
- Small container for mixing mild soap solution
The key principle: avoid anything harsh. Leather is organic material. Bleach, acetone, and aggressive cleaners strip the natural oils and damage the grain. Start with the gentlest approach and escalate only if needed.
Step 1: Remove Surface Debris and Dust
Start here. Every cleaning session begins with removing loose debris.
Use compressed air to blow out dust from seams, stitching, and the blade channel. Hold the canister upright and use short bursts. This removes particles that would turn into grit if you wet-clean over them. Grit trapped under a cloth acts like sandpaper and scratches the leather grain.
Follow with a soft-bristled brush. Brush in the direction of the grain, using light pressure. Don't scrub. You're removing dust and dried dirt, not stripping the leather. Pay special attention to the stitching where debris collects.
For stubborn dust, a microfiber cloth works better than anything else. Microfiber actually lifts dust instead of pushing it around. Regular cotton cloths just move debris across the surface.
This step takes two minutes and makes everything that follows more effective. Skipping it means you're essentially grinding dust into the leather during the cleaning steps.
Step 2: Initial Surface Cleaning with Mild Soap
Now that debris is gone, you can safely wet-clean without grinding particles into the leather.
Mix a small amount of mild soap with distilled water. Distilled water matters because tap water contains minerals that leave residue on leather. The mixture should be barely soapy, you want water with a hint of soap, not soapy water. Too much soap leaves residue and attracts dirt.
Dampen your cloth with the solution. Wring it out so it's damp, not wet. Leather shouldn't be soaking. Excess water causes the leather to swell unevenly and can lead to warping, especially around the blade channel where the leather needs to hold its shape (peer-reviewed research).
Wipe the entire sheath with gentle, circular motions. Work the cloth into seams and along stitching. Don't miss the inside surfaces, they collect sweat, blade residue, and bacteria.
For the blade channel specifically, use a slightly drier cloth. You want to clean the channel without introducing water that sits against your blade between uses.
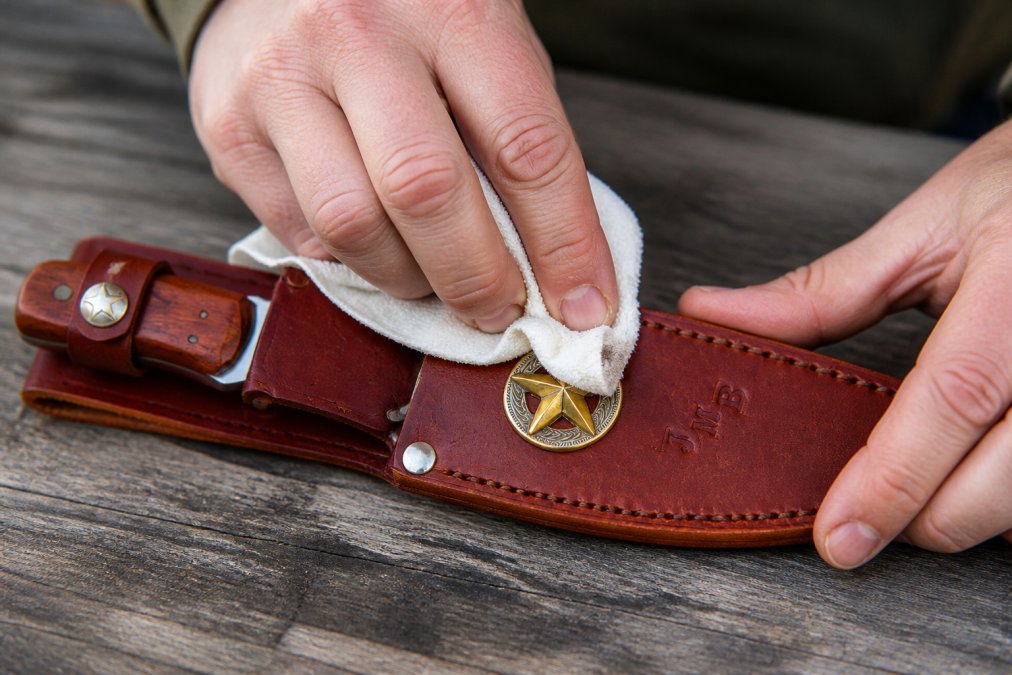
Let the sheath air dry completely before moving to the next step. This typically takes 2-4 hours in normal conditions. Don't use heat. Heat accelerates drying unevenly, which causes cracking and brittleness. Patience here prevents problems later.
Step 3: Disinfect and Remove Odors
A leather sheath absorbs sweat, bacteria, and odors from constant carry and storage. If your sheath smells off or you're concerned about bacterial growth, this step addresses both.
For light odors, open air and sunlight work surprisingly well. Set the sheath in direct sunlight for 2-3 hours. UV light naturally kills bacteria and odor-causing microbes (the CDC). This is the gentlest approach and should be your first move.
For stronger odors or visible mold or mildew, you need active disinfection. Denatured alcohol works, but it's aggressive. Always test it on a hidden area first. Apply it sparingly with a cloth, never soak the leather. Wipe the affected area, then immediately wipe again with a dry cloth to remove excess alcohol. Alcohol evaporates quickly, which is the point, but you don't want it sitting on the leather.
If you see actual mold or mildew growth, the situation is more serious. This indicates the sheath was stored in high humidity without airflow. White or green fuzzy growth on leather requires immediate action. Use a soft brush to gently remove visible mold, then apply a small amount of denatured alcohol to the affected area. After disinfecting, the sheath must dry in a low-humidity environment with good airflow. A fan pointed at the sheath for several hours helps.
Prevention is easier than remediation. Store your sheath in a dry location with airflow. Never store it in a sealed bag or in a damp basement. Humidity is leather's enemy.
Step 4: Best Leather Conditioner for Knife Sheaths
After cleaning, your leather is clean but vulnerable. Conditioning restores the natural oils that keep leather supple and protected.
A good leather conditioner for knife sheaths should:
- Absorb into the leather, not sit on the surface
- Not leave a greasy residue that attracts dirt
- Include natural oils or beeswax for protection
- Work on vegetable tanned leather specifically
Apply conditioner sparingly. A little goes a long way. Use a clean cloth and work the conditioner into the leather with gentle circular motions. Focus on areas that see the most wear: the blade channel, the belt loop, and the edges.
Let the conditioner absorb for 15-20 minutes, then buff away any excess with a dry cloth. If the sheath feels slick or greasy after buffing, you used too much. Next time, use half as much.
Condition your sheath every 3-6 months depending on use and storage conditions. Heavy users in dry climates should condition more frequently. Light users in humid environments might need less. The leather itself tells you when it needs conditioning, it starts to feel stiff or look dull.
AnchorsAweighLeather sheaths are made from vegetable tanned leather that develops a natural patina over time. Proper conditioning accelerates this aging process beautifully while keeping the leather from becoming brittle.

How to Soften Stiff Leather Sheath and Prevent Brittleness
Stiff leather is the most common complaint from new sheath owners. The good news: stiffness is temporary and preventable.

New leather is stiff because it hasn't been worked. The leather fibers are compressed and tight. Breaking in a sheath takes time, but you can accelerate the process safely.
Flex the sheath gently in your hands. Work it back and forth, bending it slightly. Don't force it or you'll crack the leather. The goal is to move the fibers and loosen them gradually. Spend a few minutes each day flexing for the first week. You'll notice the sheath becoming more supple.
Conditioning during break-in is critical. As you flex the leather, the fibers open up and become more receptive to conditioner. Apply conditioner every few days during the first two weeks. This keeps the leather from drying out as the fibers shift and realign.
Brittleness happens when leather loses all moisture. Dry, brittle leather cracks easily and can develop permanent damage. The causes are usually environmental: storage in very dry conditions, exposure to heat or direct sunlight for extended periods, or simply years of use without conditioning.
To prevent brittleness:
- Condition regularly (every 3-6 months minimum)
- Store in a climate-controlled environment, not in attics or unheated garages
- Avoid prolonged heat exposure (don't leave the sheath in a hot car)
- Never use heat to dry the sheath after cleaning
- Maintain humidity between 40-60% in storage areas (loc.gov)
If your sheath is already becoming brittle, conditioning alone won't fully restore it. At that point, you're managing decline. The leather has lost structural integrity. Continued use will accelerate cracking. This is why prevention through regular maintenance matters so much.
Hardware Maintenance and Storage Best Practices
Your sheath isn't just leather. Most quality sheaths include hardware: rivets, snaps, belt loops, or attachment points. These need attention too.
Rivets and snaps should be checked for tightness periodically. Wiggle them gently. If they move or feel loose, they're failing. Loose hardware eventually pulls through the leather, enlarging the hole and compromising the sheath's integrity. If a rivet is loose, it needs to be replaced or the sheath needs professional repair. This isn't a DIY fix, improper rivet installation can damage the surrounding leather.
Keep metal hardware clean and dry. After cleaning the leather, wipe down any exposed metal with a dry cloth. Moisture on metal accelerates corrosion and rust. If you see rust forming, use a soft cloth or very fine steel wool to gently remove it. Prevent future rust by applying a thin coat of oil to metal hardware after cleaning.
For belt loops and attachment points, check the stitching. Stitching bears the weight and stress of daily carry. Examine the stitches for breaks or fraying. Quality sheaths use saddle stitch, which is strong and durable, but even saddle stitch can fail under extreme stress or poor maintenance. If you notice loose stitching, have it repaired before the damage spreads.
Storage is where most sheaths fail prematurely. How you store your sheath between uses determines how long it lasts.
The ideal storage environment:
- Cool and dry (50-70°F, 40-60% humidity)
- Away from direct sunlight
- Away from heat sources
- With good air circulation
Never store your sheath in a sealed plastic bag. Plastic traps moisture and creates an environment where mold thrives. If you need to store the sheath long-term, use a breathable cloth bag or simply keep it in a drawer with airflow.
Don't stack heavy items on top of your sheath. Weight compresses the leather and can cause permanent deformation, especially in the blade channel. Store it flat or hanging, where it can maintain its shape.
Keep the sheath away from extreme temperature swings. Moving it from a cold garage to a hot car repeatedly causes the leather to expand and contract unevenly. This stress leads to cracking and warping. Climate stability matters more than the absolute temperature.
For sheaths you use daily, cleaning and conditioning every 3-6 months is sufficient. For sheaths in storage or used occasionally, check them every 6 months. Look for signs of mold, brittleness, or hardware failure. Catch problems early before they become irreversible.
Maintaining a leather knife sheath properly transforms it from a disposable accessory into a tool that improves with age. The process isn't complicated, it's just consistency. Regular cleaning, conditioning, and smart storage prevent nearly every problem that ruins sheaths.
AnchorsAweighLeather's handcrafted sheaths are built from quality vegetable tanned leather that rewards proper maintenance with decades of reliable service. Start with our Custom Leather Knife Sheath and follow this maintenance guide to keep it performing and looking sharp for years to come. Every sheath is hand-stitched and designed to last, the care you invest now determines how long that investment pays off.
Frequently Asked Questions
Can Dawn dish soap be used to clean leather knife sheaths?
Avoid dish soap on leather knife sheaths, it's too harsh and strips natural oils, causing brittleness and cracking. Use mild soap specifically designed for leather or a dedicated leather cleaner. If you must use household soap, dilute it heavily in water and test on a hidden area first. Vegetable-tanned leather like that used in quality handcrafted sheaths requires gentler treatment to maintain its grain and prevent damage.
What is the best leather conditioner for knife sheaths?
The best leather conditioner for knife sheaths replenishes natural oils without leaving a greasy residue. Look for conditioners formulated for vegetable-tanned leather that absorb fully and protect against moisture. Apply sparingly with a soft cloth using circular motions, allowing it to cure for 24 hours before use. Conditioning every 3-6 months maintains suppleness and prevents the stiff, brittle leather that damages your blade fit and sheath longevity.
Is rubbing alcohol safe to use on leather sheaths?
Denatured alcohol can disinfect leather sheaths effectively but must be used carefully. Test it on an inconspicuous area first, it may lighten the leather's color. Apply sparingly with a cloth, never soak the sheath, and ensure complete air drying. Use it only for odor removal or mildew treatment, not routine cleaning. Always follow with conditioning to restore oils that alcohol removes, preventing the leather from becoming dry and cracked.
How often should you condition a leather knife sheath?
Condition your leather knife sheath every 3-6 months under normal use, or more frequently if exposed to harsh weather, humidity, or dry conditions. Heavy use in outdoor environments may require quarterly conditioning. Watch for signs of dryness or stiffness as your cue to condition sooner. Regular conditioning maintains the leather's flexibility, protects the blade, and extends sheath lifespan significantly, well-maintained sheaths can last decades, while neglected ones deteriorate in years.
This article was written using GrandRanker
0 comments