
Table of Contents
- Why Cleaning and Conditioning Your Leather Holster Matters
- What You'll Need: Supplies and Tools for Holster Care
- Step-by-Step Process to Clean Your Leather Holster
- Best Leather Conditioner for Holsters
- How Often to Condition a Leather Holster
- How to Dry a Wet Leather Holster
- How to Store a Leather Holster When Not in Use
- Caring for Hardware and Stitching
- Frequently Asked Questions
Last Updated: October 8, 2026
Why Cleaning and Conditioning Your Leather Holster Matters
Leather is a natural material that demands respect. Without proper care, even the finest handcrafted leather holster will crack, fade, and lose its shape.

Your holster takes a beating. Sweat, moisture, dirt, and daily friction wear on the leather grain, gunshot residue accumulates in crevices, and temperature swings cause expansion and contraction.
The good news: proper maintenance is straightforward. Regular cleaning removes damaging debris, and conditioning replenishes the natural oils that keep leather supple.
What You'll Need: Supplies and Tools for Holster Care
Before you start, gather the right materials. Using the wrong products can damage your leather instead of protecting it.
Essential cleaning supplies:
- Soft cotton cloths or microfiber towels
- Lukewarm water
- Saddle soap or mild leather cleaner
- Soft-bristled brush (old toothbrush works)
- Paper towels for drying
For conditioning:
- Leather conditioner formulated for finished leather
- Neatsfoot oil or lanolin-based products (for dry leather)
- Clean cloths for application
Optional tools:
- Small bowl for mixing water and soap
- Soft sponge for wet cleaning
- Buffing cloth for final shine
Avoid harsh chemicals, strong solvents, or abrasive scrubbers, they damage the leather grain and strip protective finishes. Cheap products often contain additives that harm leather over time.
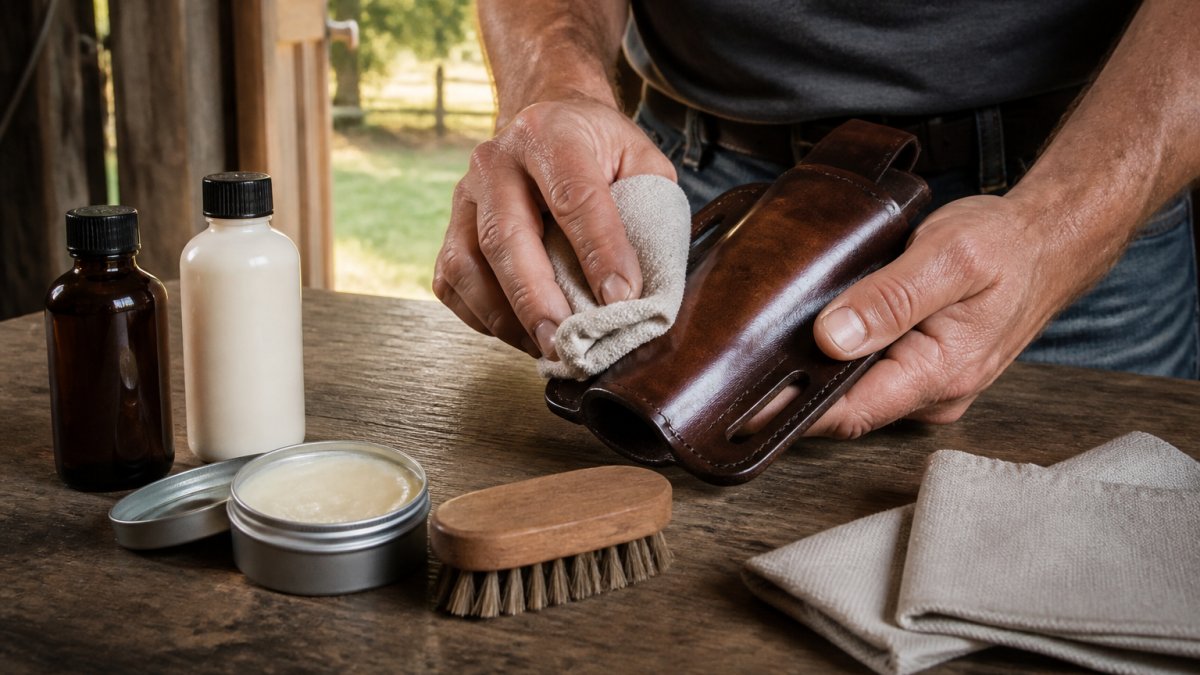
Step-by-Step Process to Clean Your Leather Holster
Cleaning removes dirt, sweat residue, and contaminants that accumulate on the surface and in crevices.
Step 2: Prepare your cleaning solution Mix lukewarm water with a small amount of saddle soap, mild, not strong.
Step 3: Wipe down the holster Work methodically across the entire surface with gentle circular motions.
Step 4: Clean hardware and stitching Wipe down metal components like retention screws and attachment points with a damp cloth.
Removing Gunshot Residue and Debris
Gunshot residue (GSR) is a real concern for holsters used at the range or in defensive situations.
After range sessions, use the soft-bristled brush to dislodge residue from crevices around the muzzle area and along seams, especially textured surfaces where particles lodge.
For heavy buildup, let a damp cloth sit on the area for a minute to soften the residue, then brush gently and wipe clean.
Addressing Mold and Mildew
Humidity and poor storage let mold and mildew thrive. If you spot fuzzy growth or dark spots, address it immediately.
Light surface mold responds to gentle cleaning. Mix one part white vinegar to four parts water, dip a cloth in it, and wipe the affected area.
For stubborn mold, repeat the process. Never use bleach or harsh antifungal sprays, they discolor and weaken leather.
Best Leather Conditioner for Holsters
"Best" depends less on brand than on three variables: the leather's finish, the climate it lives in, and how it was tanned. Get those wrong and a conditioner that works on one holster will darken, soften, or stain another.
Match the conditioner to the finish
Finished (sealed) leather, the surface has a topcoat of acrylic, polyurethane, or wax, as on most production and custom holsters.
Unfinished or vegetable-tanned leather, no topcoat, so the grain is open. Pure neatsfoot oil (not "neatsfoot oil compound") or a lanolin-heavy conditioner penetrates and restores suppleness.
Exotic or dyed leather, alligator, shark, and heavily dyed leathers can bleed or spot. Use a conditioner labeled for exotics and test first (see below).
Ingredients to avoid
- Petroleum distillates and mineral oil, they can break down the finish and leave a greasy film that attracts grit.
- Silicone-based "protectants", they seal the surface and prevent the leather from breathing, which traps moisture.
- Mink oil on finished leather, it is heavy, can darken unevenly, and softens the leather enough to compromise retention.
- Saddle soap as a conditioner, it cleans; it does not condition. Using it as a conditioner dries leather out over time.
Patch test before you commit
This is the step most guides skip, and it saves holsters. Before applying anything to the whole holster:
- Pick a hidden spot, inside the belt loop, behind the retention screw, or the underside of the sweat shield.
- Apply a pea-sized amount of conditioner with a clean cloth.
- Wait 24 hours.
- Check for darkening, blotching, tackiness, or finish lifting.
If the patch looks and feels right, proceed. If it darkened too much or looks cloudy, try a lighter product, a $10 bottle of the wrong conditioner can ruin a holster that cost ten times that.
The HOSS IWB Leather Holster, CCW Holster, Leather Holster, Universal Holster →
Climate adjustments
- Humid climates: use a lighter wax-based conditioner and apply less often. Heavy oils in humid air can promote mold.
- Arid climates: leather dries out faster. A lanolin or neatsfoot product applied more frequently keeps it from cracking.
- Coastal or salt-air environments: rinse the holster with a damp cloth after exposure, dry fully, then condition. Salt accelerates corrosion on both leather and hardware.
Application, done right
Apply a small amount to a clean, lint-free cloth, not directly to the leather. Work it in with light circular motions, let it sit 15-30 minutes, then buff off the excess with a dry cloth. Let the holster sit at least an hour before holstering a firearm so the conditioner cures.
leather care guidance from a tannery or leatherworking trade association
How Often to Condition a Leather Holster
Frequency depends on use and climate, a holster riding against skin daily in hot, humid conditions needs conditioning more often than one used occasionally in a dry climate.
General guidelines:
- Heavy daily carry in humid climates: condition every 4-6 weeks
- Regular use in moderate climates: condition every 8-12 weeks
- Occasional use or dry climates: condition every 3-4 months
- After range sessions or exposure to moisture: condition as soon as the holster is fully dry
Watch your leather: dull or stiff means conditioning is overdue, soft and supple means you're on schedule. Over-conditioning is possible, too much product leaves sticky residue and attracts dirt.
How to Dry a Wet Leather Holster
Moisture is leather's enemy, so act quickly when your holster gets wet.
Never use direct heat, no hair dryers, ovens, or radiators. Heat shrinks, cracks, and brittles leather. Air dry at room temperature instead.
Proper drying steps:
- Pat the holster dry with a clean cloth
- Stand it upright in a well-ventilated area away from direct sunlight
- Allow 24-48 hours for complete drying depending on how wet it was
- Avoid humid spaces like bathrooms during the drying period
Once fully dry, condition the leather to restore oils lost during wetting and drying, preventing the cracking and hardening that occur if you skip this step.
How to Store a Leather Holster When Not in Use
Storage conditions determine how well your holster holds up over months or years of non-use.
Keep these factors in mind:
- Store in a cool, dry place away from direct sunlight
- Maintain consistent temperature and humidity
- Avoid plastic bags or airtight containers that trap moisture
- Use breathable cloth storage bags instead
- Keep away from heat sources and damp basements
Sunlight fades leather and causes uneven color changes, humidity promotes mold, and temperature swings weaken the material over time. A bedroom closet or climate-controlled space works well.
For extended storage, condition the holster before putting it away to keep the leather supple, and check it every few months, even stored leather can develop mold if humidity spikes.
Caring for Hardware and Stitching
Hardware and stitching fail before the leather does. A holster with a rusted snap, stripped tension screw, or frayed seam is out of service even if the leather looks pristine, and this is where a few minutes of attention pays off most.
Know your hardware
A typical leather holster carries several metal components, each with different vulnerabilities:

- Snaps (thumb breaks, retention straps): usually nickel-plated brass or stainless steel. Plating can wear through, exposing the base metal to sweat and salt. Inspect the snap's spring tension, if it releases too easily, the holster is no longer safe for carry.
- Rivets: often copper or brass. They can loosen with use. A loose rivet lets the leather layers separate and can snag on clothing.
- Tension screws (retention screws): usually a screw-and-post set, sometimes with a rubber or nylon washer. The screw can back out over time; the washer can dry-rot.
- Belt clips and loops: metal clips can lose spring tension; leather loops can stretch.
Cleaning and protecting metal
- After cleaning, dry metal parts immediately with a clean cloth, don't let water sit where hardware meets leather.
- Use a soft brush or cotton swab to clear lint and grit from around rivets and screw heads.
- Apply a very small amount of non-petroleum metal protectant, light gun oil, dry-film lubricant, or wax-based corrosion inhibitor, to the metal only, wiping off excess so it doesn't migrate onto the leather and stain or soften the finish.
- Never use silicone spray on the leather itself; it seals the surface and traps moisture.
Tension screws and retention
Check retention screws every few months. If the holster feels loose, tighten a quarter turn at a time and re-test, over-tightening compresses and can crack the leather at the screw hole. If the screw keeps backing out, a small dab of removable blue threadlocker (not permanent red) holds it without blocking future adjustment. Replace a cracked or missing washer before it chews through the leather.
Stitching: the real failure point
Holster stitching is usually nylon or polyester, sometimes waxed linen on traditional builds. Sweat, salt, and grit abrade the thread, and one broken stitch can start a run that opens a seam.
- During cleaning, run a soft brush gently along seams to lift grit from the stitch line.
- Inspect seams every few months under good light for fraying, fuzziness, or loose stitches.
- If you find a broken stitch, stop carrying the holster until repaired, a cobbler or the holster maker can re-stitch a seam, and a failed seam can drop a firearm.
- Don't apply conditioner directly to the stitch line; excess oil wicks into the thread and weakens it.
When to retire hardware
Replace, don't repair, any snap that lost its spring, rivet that won't stay tight, or screw that stripped its threads in the leather. These are safety components, not cosmetic ones, a holster that won't retain the firearm reliably is a liability no matter how good the leather looks.
Frequently Asked Questions
How do you clean a leather holster?
Start by removing loose debris with a soft brush or cloth. Wipe the holster with a damp cloth to remove dust and dirt, then use a leather-specific cleaner on stubborn stains. For gunshot residue, use a slightly damp cloth with a mild soap solution, working gently to avoid damaging the grain. Finish by buffing dry with a clean cloth. Never use harsh chemicals or solvents that can strip the leather's natural oils.
What should you use to condition a leather holster?
The best leather conditioner for holsters uses natural oils like neatsfoot oil or lanolin, which restore moisture and flexibility without softening the leather excessively. Apply conditioner sparingly with a soft cloth, working it into the grain in circular motions. Avoid over-conditioning, which can make retention too loose and compromise your holster's structural integrity.
How often should you condition a leather holster?
Condition your leather holster every 3-6 months under normal use, or more frequently if exposed to moisture, humidity, or harsh conditions. Check your holster's appearance and feel, if the leather looks dull or feels stiff, it's time to condition. Avoid over-conditioning, which can cause cracking and loss of shape.
How should you store a leather holster when not in use?
Store your leather holster in a cool, dry place away from direct sunlight and extreme temperature swings. Keep it in a cloth bag or wrapped in cotton to prevent dust accumulation. Avoid plastic bags, which trap moisture and promote mildew growth. Keep tension screws and hardware accessible for occasional inspection and lubrication.
Proper maintenance keeps your leather holster reliable for years. Regular cleaning removes damaging debris. Conditioning preserves the leather's natural properties. With these habits, your holster stays functional and comfortable through daily carry. AnchorsAweighLeather builds holsters designed to last a lifetime, and following this care routine ensures yours does exactly that. Get started with a quality handcrafted holster from AnchorsAweighLeather and maintain it right.
0 comments