
Table of Contents
- Why Your New Leather Holster Feels Too Tight
- How to Break in Leather Holsters: The Ziplock Bag Method
- The Elbow Grease Method: Manual Stretching and Drawing
- Using Leather Conditioners and Oils the Right Way
- Understanding Leather Holster Break In Time
- How to Stretch a Leather Holster Without Ruining It
- Leather Holster Maintenance Tips for Long-Term Fit
- Common Mistakes to Avoid During Break-In
- Frequently Asked Questions
Last Updated: September 7, 2026
A new leather holster should fit like a firm handshake, not a bear trap. If your freshly delivered rig is fighting you on the draw, that is normal. The leather holster break in time is a real phase every quality holster goes through, and rushing it is the fastest way to ruin expensive gear. At AnchorsAweighLeather, we handcraft holsters from full-grain leather.
The goal is to mold the leather to your firearm while maintaining proper retention, a snug fit that holds the gun securely but allows a smooth draw. This guide covers proven methods, common mistakes, and how to avoid over-stretching.
Why Your New Leather Holster Feels Too Tight
A tight new holster is a sign of quality, not a defect. Vegetable-tanned leather is stiff when new, holding the shape it was molded into during manufacturing. The tight fit ensures the trigger guard is covered and the firearm stays secure.
Friction points concentrate where the slide and frame press against the leather. As you wear the holster, the fibers gradually relax and conform to the gun's contours, the break-in period working as intended.
Many owners panic and force the draw, scratching the slide or loosening retention permanently. Patience matters more than muscle.
How to Break in Leather Holsters: The Ziplock Bag Method
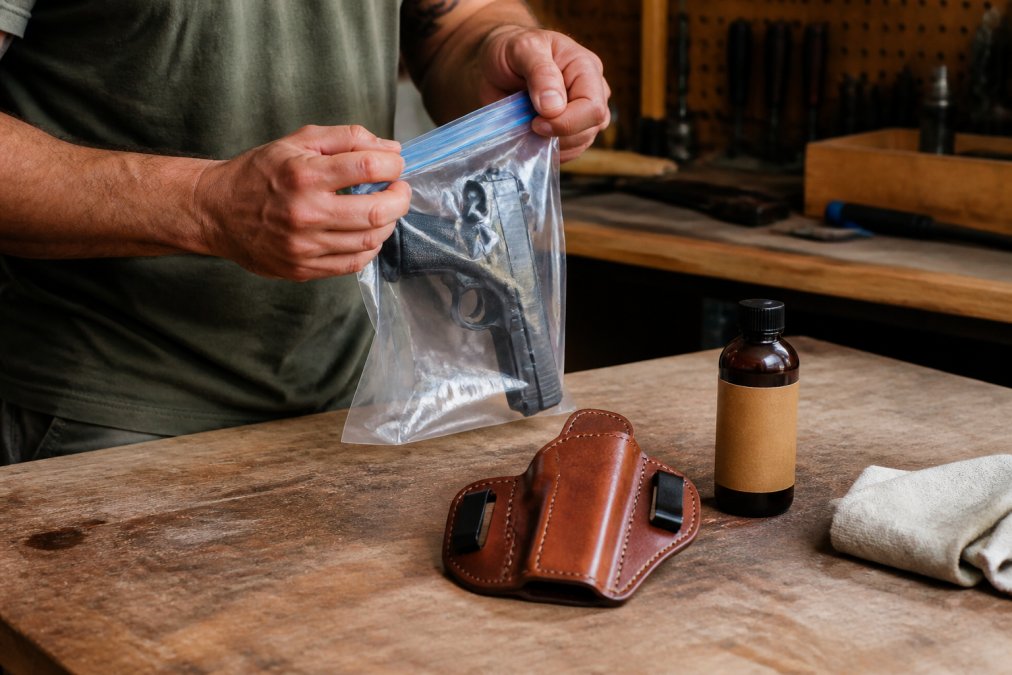
The ziplock bag method is the most controlled way to break in leather holsters because it applies even, consistent pressure across the entire holster body. This technique takes about 48 to 72 hours and produces the most predictable results.
Unload your firearm completely and confirm the chamber is empty. Place the gun inside a heavy-duty ziplock bag, then wrap it tightly with a few layers of plastic wrap to create a snug, waterproof barrier that protects the leather from moisture while gently stretching the fit.
Slide the wrapped firearm in slowly. Leave it seated for 24 hours, then remove it, add one more layer of plastic wrap, and repeat. This incremental approach stretches the leather gradually without creating loose spots.
The Elbow Grease Method: Manual Stretching and Drawing
For results in a single afternoon, the manual stretching method works but demands discipline, involving repeated draw practice and targeted pressure on friction points.
Unload the firearm and confirm it is empty. Apply a small amount of conditioner to the outside only, never the inside. Insert the unloaded firearm and practice your draw slowly, focusing on a consistent angle. Repeat 50 to 100 times, allowing the holster to warm from friction and body heat.
For stubborn spots around the trigger guard or slide, use the blunt end of a wooden dowel wrapped in a soft cloth to apply gentle pressure from the inside, working in small circles and checking the fit frequently.
Using Leather Conditioners and Oils the Right Way
Leather conditioners soften fibers and speed up break-in, but overusing them destroys structural integrity. The key is moderation, proper application, and knowing your leather type.
Know Your Leather: Vegetable-Tanned vs. Chrome-Tanned
Most high-quality holsters are vegetable-tanned using natural tannins from tree bark. It is stiff, dense, and holds its molded shape exceptionally well, responding beautifully to conditioning.
Chrome-tanned leather, by contrast, is tanned using chromium salts. It is softer and more pliable out of the gate but does not hold a molded shape as precisely. It is more water-resistant but breaks down faster with heavy oils, so use a lighter, water-based conditioner instead.
Choosing the Right Conditioner
For vegetable-tanned leather, you have several solid options:
- Neatsfoot oil: A classic choice that penetrates deeply. Use the pure, compound-free version. It darkens the leather noticeably, so test it on an inconspicuous spot first.
- Mink oil: Heavier than neatsfoot, mink oil adds water resistance. Use it sparingly, it can soften leather faster than you expect.
- Beeswax-based conditioners: These sit more on the surface, adding a protective layer without deep softening. Good for maintenance, less effective for break-in.
Avoid denatured alcohol, silicone-based products, and any conditioner with added dyes or fragrances. These can dry out the leather, leave a residue that transfers to your firearm, or cause uneven softening.
How to Apply for Break-In vs. Maintenance
Conditioning to break in a holster differs from conditioning to maintain one. For break-in, you want the conditioner to penetrate and relax the fibers. For maintenance, you want to keep the leather supple without changing the fit.
For break-in: Apply a thin layer to the outside only, never the inside, which can transfer oils to the firearm and soften retention too quickly. Let it absorb for 30 minutes, insert your unloaded firearm, wait 24 hours, assess, and repeat only if needed.
For maintenance: Condition every two to three months, or more often in dry climates. A single light application is enough. The goal is to replace the natural oils lost to sweat and exposure, not to soften the leather further.
The Over-Conditioning Trap
Leather that becomes too soft loses retention, which is dangerous for concealed carry. If the holster feels floppy or the gun shifts during movement, stop conditioning and let the leather dry naturally for a week or two. In severe cases, the damage is permanent, err on the side of too little.
Understanding Leather Holster Break In Time
The leather holster break in time varies by method, leather thickness, and wear frequency. A quality full-grain holster typically takes one to two weeks of daily carry to feel fully broken in, with the ziplock method compressing that to a few days.
| Method | Time Required | Best For |
|---|---|---|
| Ziplock bag | 48-72 hours | Even, predictable molding |
| Manual draw practice | 1-3 sessions | Active shooters who carry daily |
| Conditioner only | 1-2 weeks | Softening without reshaping |
| Combined approach | 3-5 days | Most balanced results |
Retention should remain snug throughout break-in. If the firearm rattles or shifts during movement, you have over-stretched it. A properly broken-in holster holds the gun securely while allowing a clean draw with no binding.
How to Stretch a Leather Holster Without Ruining It
The line between a perfect fit and a ruined holster comes down to how you stretch leather holster materials. Over-stretching creates a loose, unsafe carry; under-stretching leaves you fighting the draw. Here is how to work incrementally, and what to do if you have gone too far.
The Incremental Approach
Whether using the ziplock method or manual pressure, work in small increments. Add one layer or one session at a time, checking the fit after each step. The leather should hug the firearm with firm resistance, not squeeze it so hard you need two hands to draw.
A good rule of thumb: the holster should hold the gun securely when you hold the holster upside down and give it a firm shake. If the firearm slides out, you have over-stretched it.
Signs You Have Over-Stretched
- The gun rattles or shifts during normal walking or bending.
- You can draw the firearm with zero resistance.
- The trigger guard is no longer fully covered.
- The holster mouth has a visible gap or wave along the edge.
If you notice any of these signs, stop the break-in process immediately. Do not try to "fix" it by squeezing the leather or applying heat, both will cause permanent damage.
Can You Fix an Over-Stretched Holster?
The short answer: you cannot fully reverse over-stretching. Leather does not shrink back once the fibers have been relaxed past their natural limit. However, you can salvage the holster or prevent the problem from worsening.
Option 1: Add a spacer or shim. If only slightly loose, insert a thin spacer, stiff cardboard or a folded index card, between the leather and firearm at the retention point. This temporary fix can restore enough friction for safe carry.
Option 2: Re-wet and re-mold. For vegetable-tanned leather, dampen the outside with distilled water, do not soak it. Insert the unloaded firearm wrapped in a single layer of plastic wrap and let it dry at room temperature for 48 to 72 hours. This can tighten the leather slightly, but results vary. Do not attempt with chrome-tanned leather.
Option 3: Accept the loss and replace. If the gun falls out during normal movement, retire the holster. A holster that does not retain the firearm is a liability, the cost of a new one is far less than the consequences of a negligent discharge.
Preventing Over-Stretch in the First Place
- Never force the draw. If it takes more than moderate effort, stop and reassess.
- Do not add more than one layer of plastic wrap per 24-hour period.
- Skip the heat guns, ovens, and boiling water. Heat is the fastest way to ruin a holster.
- Check retention after every break-in session, not just at the end.
Leather Holster Maintenance Tips for Long-Term Fit
Once broken in, regular care keeps the leather supple and the fit consistent for years.
Condition every two to three months, or more often in dry climates. Wipe the holster clean with a dry cloth after each use. Sweat and moisture break down the fibers and cause the holster to lose its shape over time.
Inspect regularly for wear, especially around the retention area and the mouth where the gun enters. Cracks or excessive softness mean the leather is drying out. Address these early with conditioning, and replace the holster if retention becomes unreliable.
Common Mistakes to Avoid During Break-In
Most holster damage happens during break-in, not from years of use. Avoid these common mistakes to protect your investment.
Rushing with excessive force is the biggest error, it can tear stitching or crack the leather grain. Too much oil or conditioner softens the leather unevenly, creating weak spots that stretch out of shape.
Skipping the unloaded firearm safety check is another critical mistake. Always verify the gun is unloaded before any break-in work. Practicing draws with a loaded firearm builds dangerous muscle memory.
Finally, do not use heat guns, ovens, or boiling water. Heat damages the leather's structure and can cause permanent shrinking or warping. The patient methods described here produce a holster that fits like it was custom-molded.
Breaking in a new leather holster tests your patience, but the payoff is a rig that fits your firearm and your body perfectly. Rushing the process, over-conditioning the leather, or forcing the draw leads to a loose, unsafe holster. Take the time to do it right, and your holster will serve you faithfully for years. At AnchorsAweighLeather, every holster we handcraft, from the versatile The HOSS IWB Leather Holster to a fully custom IWB design, is built from premium full-grain leather that molds to your firearm with proper care. Get started with a handcrafted American-made holster and break it in the right way from day one.

Frequently Asked Questions
How long does it take to break in a leather holster?
Most leather holsters need 1 to 3 weeks of regular use to fully conform to your firearm. The exact leather holster break in time depends on the leather thickness and how often you practice your draw. Using the ziplock bag method can speed this up to a few days. You will know it is ready when the firearm seats fully and the draw stroke feels smooth without forcing.
Can you use oil to break in a leather holster?
Yes, but use it sparingly. Apply a thin coat of leather conditioner or neatsfoot oil to the outside of the holster, then let it absorb overnight. Too much oil softens the leather and ruins retention.
What should you avoid when breaking in a leather holster?
Never use heat guns, microwaves, or boiling water to speed up the process. These dry out leather fibers and cause cracking. Do not force your firearm in with excessive pressure, which can tear stitching. Skip stretching with tools that over-expand the leather, since this kills holster retention permanently. Stick to slow methods like the ziplock bag trick or repeated manual drawing with an unloaded firearm.
How do I know when my holster is properly broken in?
A properly broken-in holster seats your firearm with a distinct click and holds it securely when you shake it upside down. The draw should be smooth with a slight, consistent retention on the trigger guard. There should be no tight spots or friction points that stop the slide. If the firearm rattles or falls out, you have over-stretched it and need a new holster.
0 comments